
So without further ado, here it is...


I wanted the book to be sturdy, as I do expect some abuse, since I am not a gentle crafter. I also wanted it to be able to open really wide. In the end I went with a fairly large gap between the spine and the covers. Mounted it al on some distressed muslin, reinforced with a paper backing. I attached some embellishments to the spine and the front cover. Keeping it rather plain, again with the planned abuse kept in mind. I then glued the front and back covers to the book and took some lace to tie it all together. I left the lace loose, so it wouldn't be in the way while working in the book.
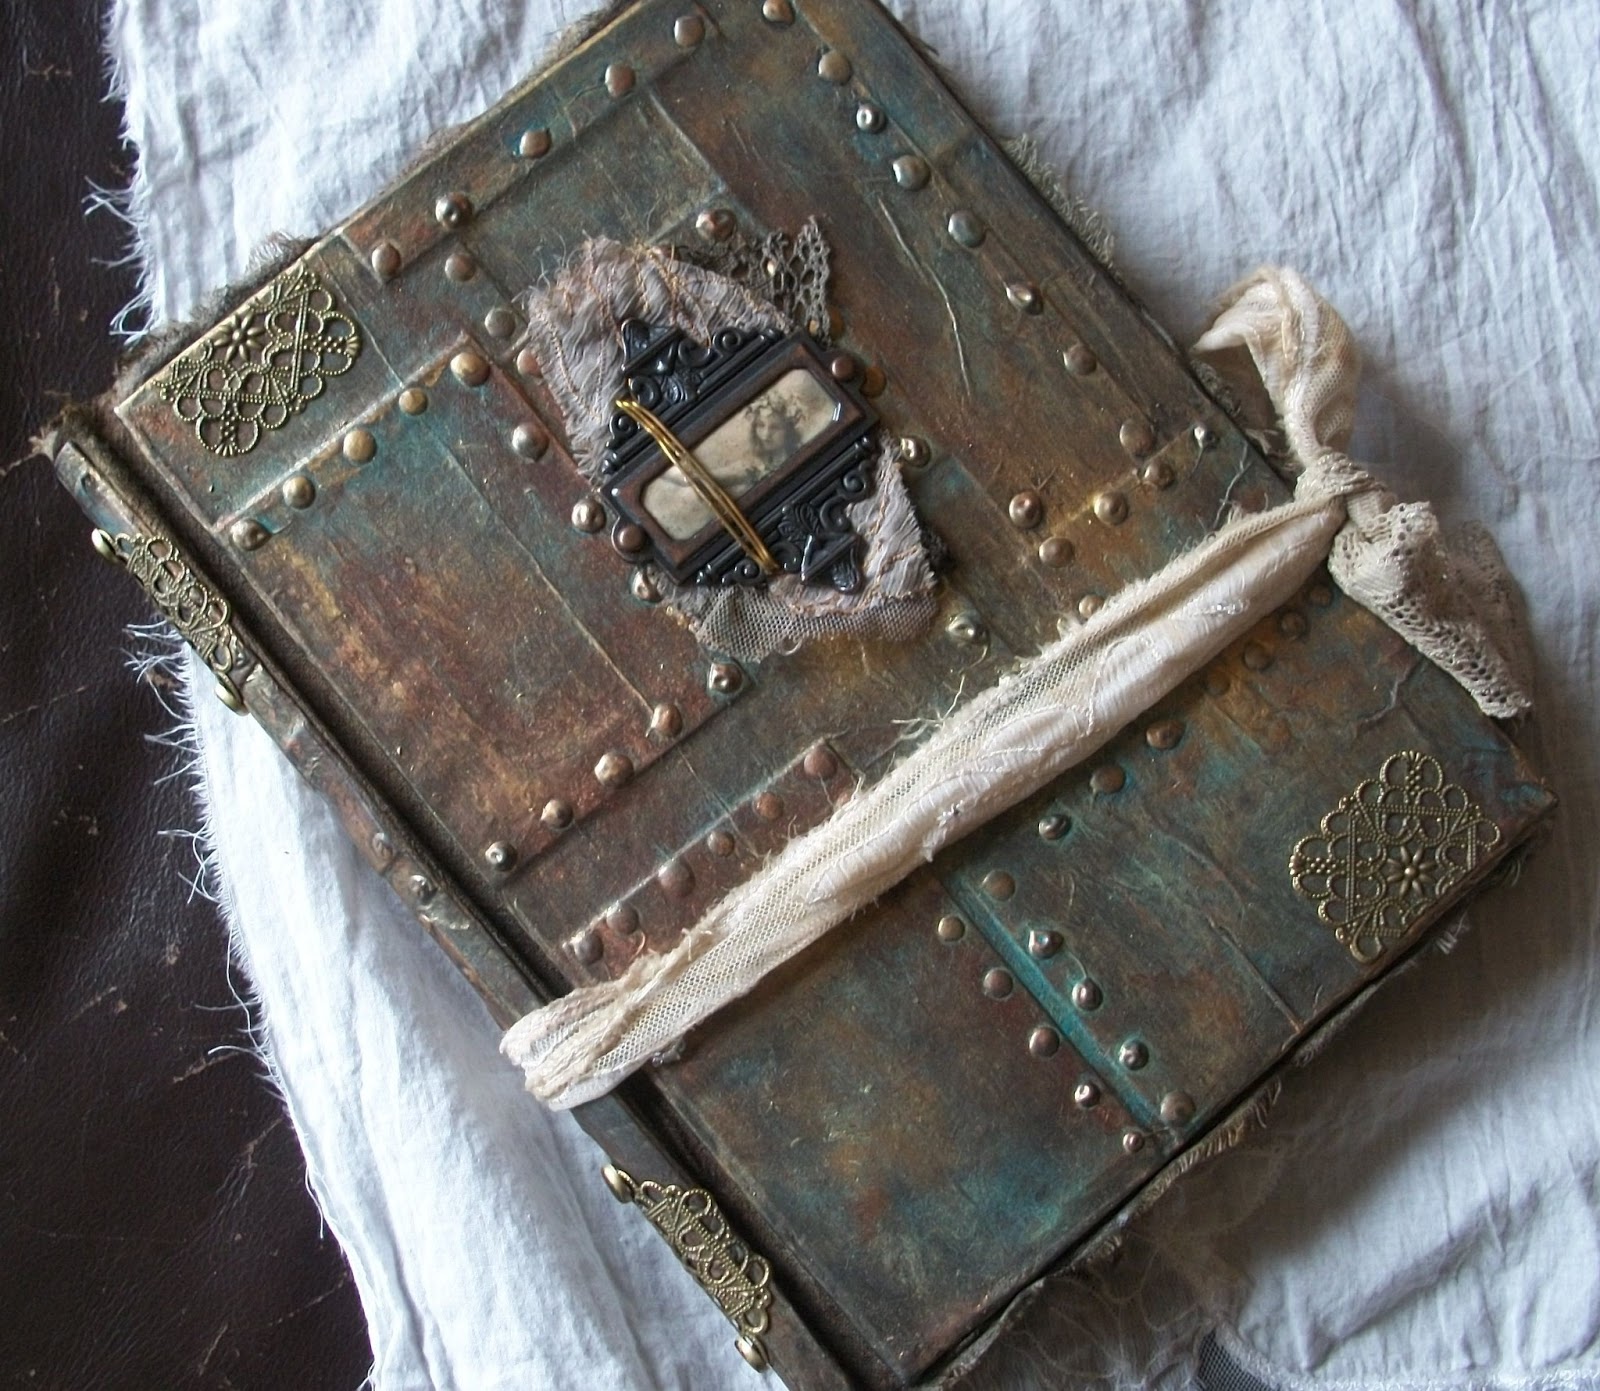
The fabric backing peeks out from the sides of the book with frayed edges and gives the book a nice strokable feeling when holding it.


I still have some touching up to do with alcohol inks on the brads of the spine and maybe the copper wire on the bookplate.


And here is the back cover, wich I left completely plain.

I entered this book in the following challenges:
- Eclectic paperie - get alterted challenge -altered fabric, since I did use fabric in this project. This is my second entry in this challenge (I do like fabric), so I'm not sure wether that is permitted.
- Challenges for everybody - challenge #16 - anything goes.

Monique wow...truly stunning and what a joy it will be to watch you fill the pages!!
ReplyDeleteThank you so much for linking up a eclectic Paperie.
Hugs
Tracy
Xxx
Thank you for your kind comment, Tracy, and thank you for subscribing =)
DeleteHI Monique, What very creative projects, love all of your little books and the wonderful techniques you have used. Look forward to seeing more in the future as I have now become a follower.
ReplyDeleteAvril x
Thank you, Avril, I'm glad you like it =) and thank you for subscribing.
DeleteYour journal looks fantastic, Monique!
ReplyDeleteLove the aged metal surface you created!!! Awesome!
Hugs and thanks for visiting my workdesk,
die amelie
Thank you =)
DeleteNow I keep asking myself, how you did this wonderful book cover... And I keep asking and asking and asking... I just NEED to try this myself... I will spend my hole Sunday afternoon thinking about your extravagant alchemy of turning paper into metal :-).
ReplyDeleteAll I can say is WOW! I'm so excited about finding your blog and all the deliciousness in it - you've reinvigorated my love of creating books and I hope to try one like your journal soon! xx
ReplyDeleteAbsolutely wonderful! Thank you for the tutorial in the making of your journal.
ReplyDeleteThank you Beth =)
DeleteI appreciate this was done a while ago but I just came across it on Pinterest. I have read first post & this..... Wow!! Rusty, metallic, a bit vintage, that wonderful "been around for years" look (& I suspect feel). I admit, I get a bit lost with some parts but that's me, nothing to do with your concise, clear description. My brain cannot "get it" when binding, measuring spines & covers etc. Frustrates me madly as would SO like to make my own. However, for me, the genius here (imho) is the look! If I saw it without knowing, I would think it was all the things I listed above. Absolutely brilliant! Kudos. C
ReplyDeleteThank you Caroline, it was really fun to make =)
DeletePleasure😊
Delete